


A Step-by-Step guide to Breaking in Your New Softball Glove
Congratulations on your new glove. Now it's time to break it in. These steps will guide you through the glove break-in process:
Step 1: Soften the Pocket with Warm Water
Pour warm water into the pocket with the fingers facing up. This helps soften the leather for easier stretching and shaping.
(Do not use boiling water. If you prefer a longer, natural break-in, you may skip this step.)
Step 2: Stretch the Glove
Grab the top of the pinky and thumb and gently stretch the glove.
The finger tops and web lace will stretch but will retain some of their shape once dried.
Avoid overstretching if you prefer a tighter feel.
Step 3: Stretch the Web
Fold the top of the web and press down for 5–6 seconds.
Repeat at different points until you achieve your desired feel.
Step 4: Work the Heel of the Glove
Grip the thumb and pinky near the heal of the softball glove then flex back and forth. Don't be afraid to use force as this is the stiffest part of the glove. This will soften leather around the heel pad. Do this several times until you have your desired feel. The glove should start to become easier to open and close.
Step 5: Establish Break Points
Close the glove and use a mallet to pound the thumb side.
Flip the glove and fold the pinky side, pounding from the back.
This creates natural break points for easier opening and closing.
Player Fit Tip:
-
6U–12U (younger players): Fully break in the heel for easier closing
-
12U–College: Leave some stiffness for a more custom feel
Every player is different—there is no “right” way, only what works best for you.
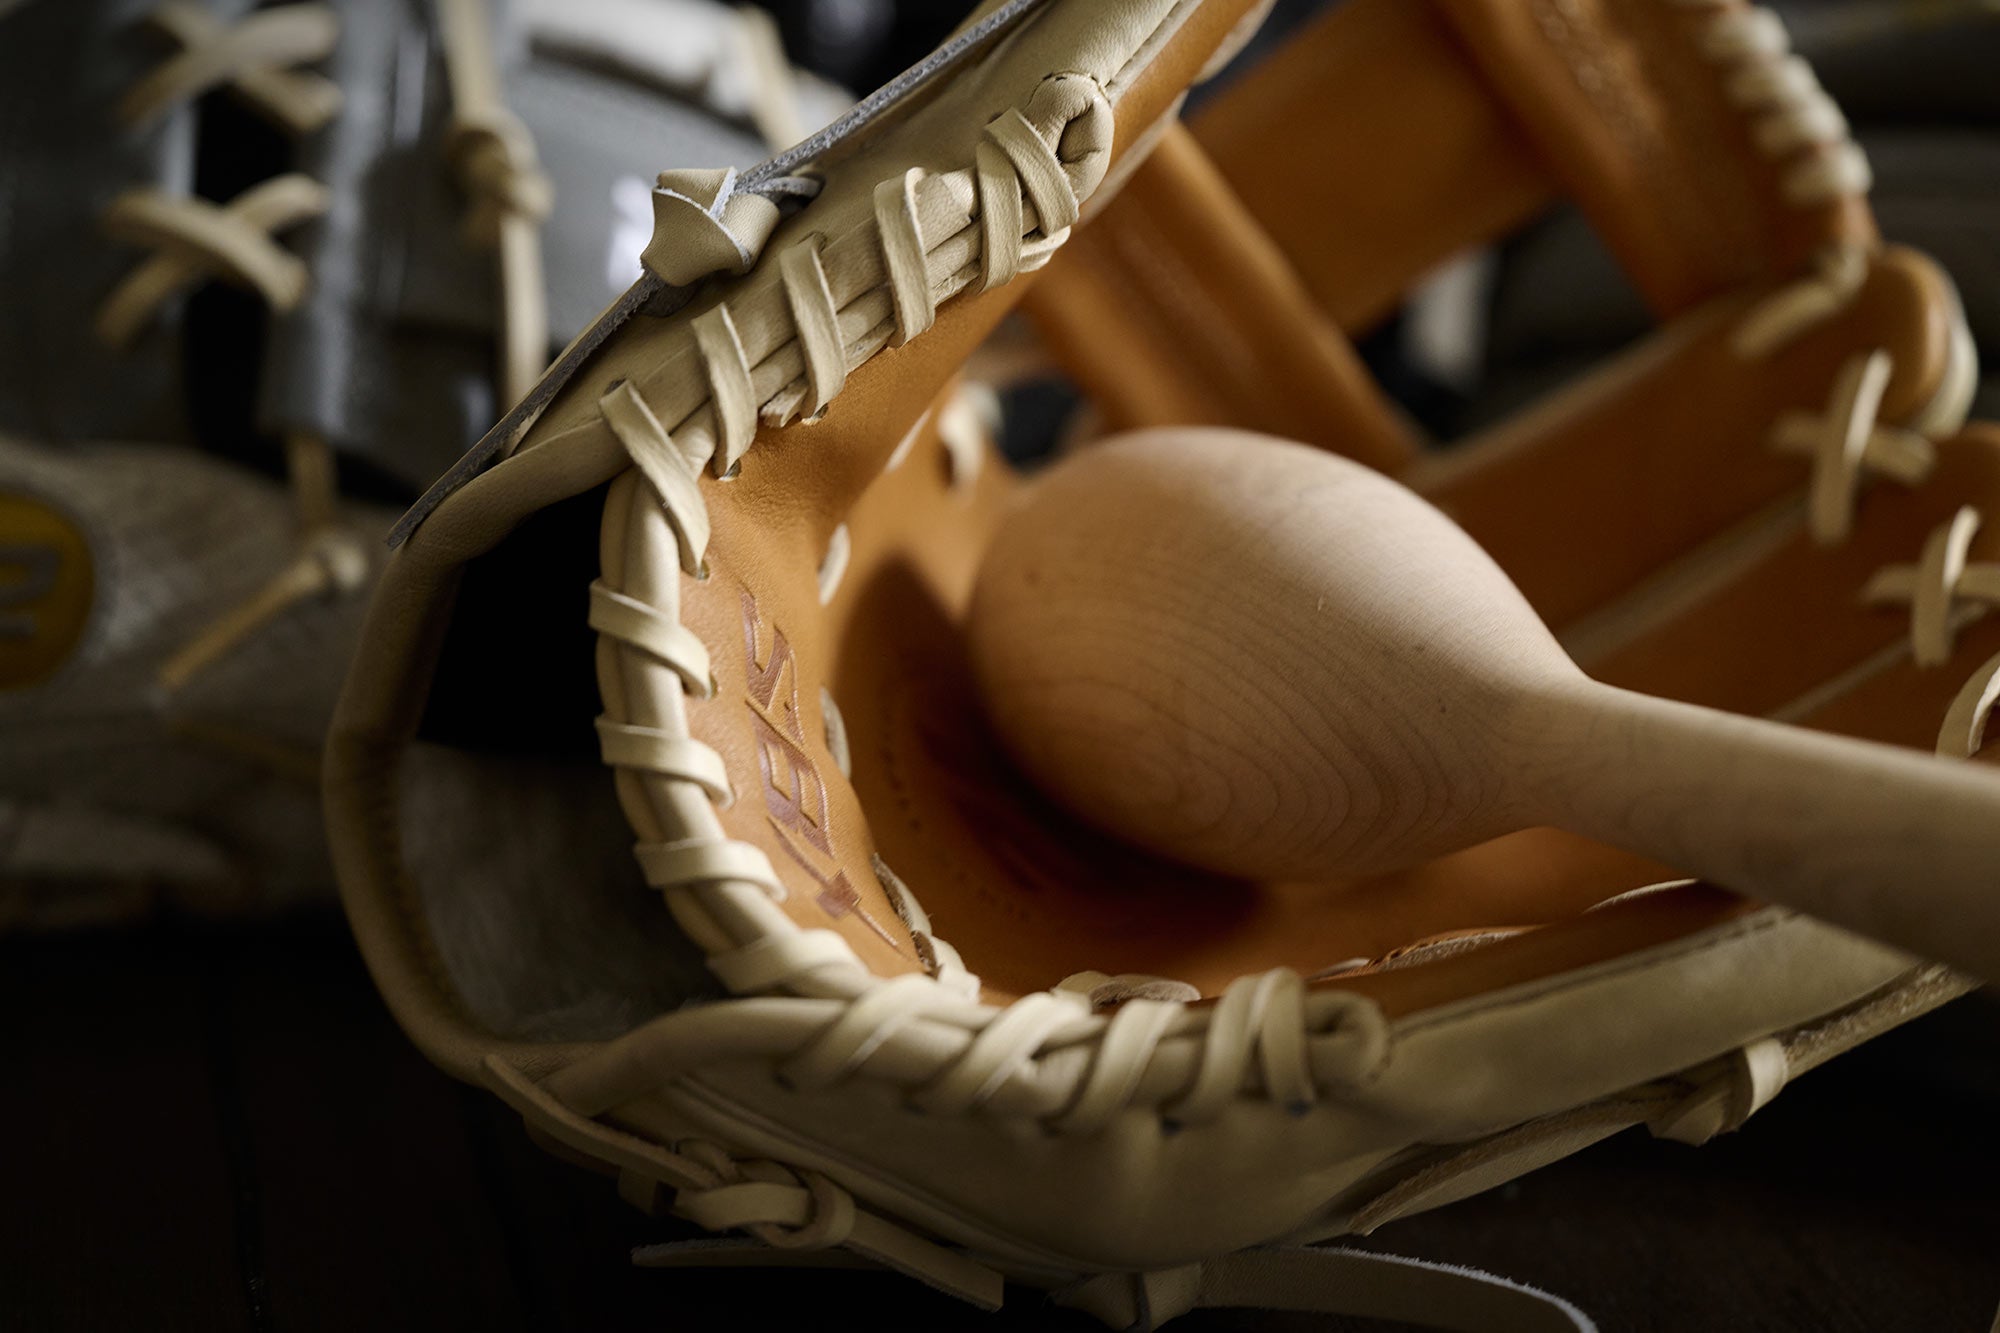
Step 6: Shape the Pocket
Open the glove and use a mallet to shape the pocket where you want to catch the ball.
Ball Size Guide:
-
6U–8U → 10” softball
-
10U → 11” softball
-
12U–College → 12” softball
The harder you hit the pocket (while wet), the deeper it will form.
Take your time and check depth often.
*If you’re a younger player or not playing catch with enough velocity, fully form the pocket with a mallet.
Step 7: Play Catch
Play catch to finish the break-in.
The impact of the ball will:
-
shape the pocket naturally
-
improve feel and control
*Over time, your glove will develop palm and finger imprints, making it uniquely yours.
Be patient—this does not happen overnight.
**If Necessary repeat steps 2-7
Step 8: Let it Dry
Place a ball in the pocket and let the glove air dry for 12+ hours or until fully dry.
Pro Tip 1
For your first 1–2 sessions of playing catch, make sure your glove is warm before use.
Place the glove in direct sunlight for a short period of time. This will help soften the leather and allow the glove to open and close more easily as you continue the break-in process.
*Avoid excessive heat or leaving the glove out too long.
Pro Tip 2
If the glove is too tight around the wrist, it can make it more difficult to open and close properly.
Make sure the wrist opening is adjusted for a comfortable, secure fit—not overly tight. A proper fit will allow for better control and easier closure during play.
The LAB Break-in Services
Breaking in a softball glove can be a meticulous process. If you are not comfortable breaking in your own glove you have the option to use "The LAB". Learn More >>
